DIY Oil Painting Studio Setup
How to create the perfect art studio with found (or cheap!) items
Minimum requirements for Space, Easel, and Taboret. PLUS, how to make a DIY Still-Life Table!
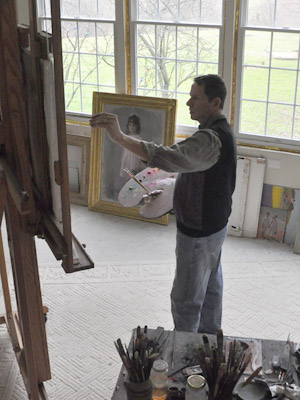
The comprehensive guide to an inexpensive oil painting studio setup (essentials for the Starving Artist): Being an artist is hard. It just plain ain’t easy. Thus., the last thing any artist- especially a student, needs is obstacles that make it any more difficult. A straight, smooth path to the easel is important. Hence the need for a studio and easel on call.
You don’t need to wait for the perfect studio to get started with painting. Amazing paintings have been done in rudimentary settings (visit any museum for proof of this). You can get started today. Mr. Chambers offers students advice on setting up a home studio that is affordable and manageable.
Essential studio requirements:
- Space: You need a space that is devoted 100% (if at all possible) to your art. It needn’t be huge, but available. If you have to clear out space to work, then you’re almost defeated before you’ve begun. It can be a room or a corner, but it must be yours.
- Easel: A reliable, sturdy easel that you can adjust to accommodate your height and also varying sizes of canvases/panels. You can easily make one (see below) or purchase. Mr. Chambers suggests a single-mast easel for rigidity and space-saving design.
- Taboret: This holds your palette and supplies, and is about table-top height (approx. 32″). Can be something you pick up at an antique or second-hand store (e.g. an old chest, small dresser/nightstand, bookshelf, etc.). Drawers to hold your drawing/painting materials is a plus.
- Still-life Table: Should be about 48″ tall. Add a couple “walls” to the side(s) and back to control the lighting and hang cloths for interesting backdrops for your still-life setups.
- Rug: Cushions your feet and legs as you work standing. I don’t recommend sitting down to work, as it diminishes your ability to see clearly and “largely”.
Details:
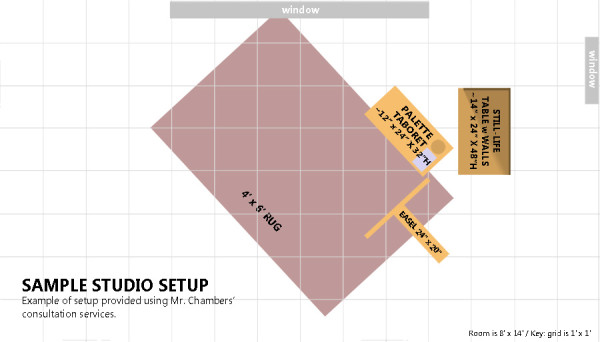
Space: here’s an example of a student’s studio. It’s a loft space (in this case 8’x14′) with a large window. Mr. Chambers designed the setup to provide an appealing light on the still-life table as well as even lighting upon the easel. Notice that the easel is designed for a right-handed artist to avoid a cast shadow from the painting hand.
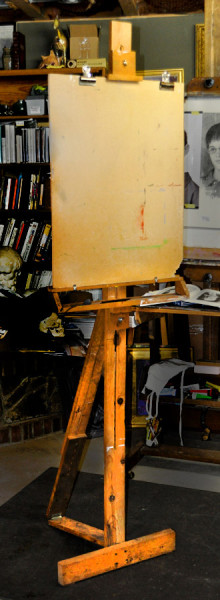
Easel: I recommend a simple single-mast easel, such as this homemade one shown to the right (more pictures here). You can also purchase a nice one inexpensively like this one at dickblick.com ($130). Both of these stand about 7-7.5′ in height to accommodate a tall person and large painting. Single-mast easels have a small footprint compared to tripod type easels. If you already have a French easel or pochade easel, they can work fine also, but do take up a bit more floor space, and thus are less flexible in terms of your setup arrangement.
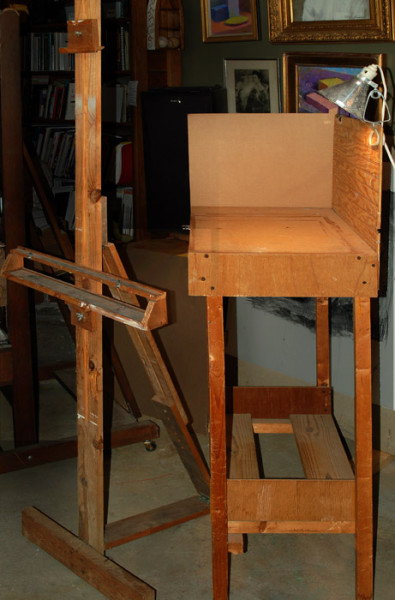
Taboret: Almost any little table can do the trick here. Height is important. Too low or too high and using your palette or rinsing brushes becomes more than an afterthought. The one below is a temporary taboret Mr. Chambers made while visiting a friend’s home. It was assembled from old items in his friend’s attic, and served its purpose. :)
Still-life Table: This is a tall table used to display your still-life objects while facilitating the need for a backdrop and for control of the lighting for your setup. (more pictures here)

A creative environment is a lot closer than you think. :)
If you’d like professional advice on setting up a studio in your home, Mr. Chambers is available for consultation. He’ll draw up a floorplan showing you how to set up your studio to take best advantage of your space and lighting situation. Click here for more info.
Contact the studio to send photos of your setup! Mr. Chambers would love to see what you’ve done to create your painting studio.


